
If you've ever looked at your nails and wished for a salon-quality finish without stepping outside your door, you're not alone. Making press-on nails at home not only saves time and money, but it also lets you tailor the length, shape, colour and style to perfectly match your mood or plans — whether you’re rushing to a last-minute brunch or prepping for a big night out.
At Bianco Sue, we believe beauty should be easy, accessible and fun — and press-on nails are the perfect way to express yourself without the hassle of salon appointments.
Press-on nails have come a long way from their early days. They’re now just as versatile as traditional manicures, and the best bit is, they’re super simple to customise from the comfort of your kitchen table. From understated nudes to extravagant glitter, the options are only limited by your own creativity (and maybe your patience with tiny rhinestones).
Why Press-On Nails?
First, a bit of context. Press-ons are fake nails that are designed to literally press onto your natural nails using adhesive or glue. They come in many shapes and finishes and are reusable if removed carefully. Press-ons are a favourite because:
● Time-saving: With the right sizing, most sets can be applied in under 15 minutes.
● Low commitment: Swap out your look whenever you please.
● Budget-friendly: Affordable price and easy application.
● Damaging? Not if you’re gentle: Done right, your natural nails stay healthy.
They’re the secret weapon for anyone who’s not a fan of waiting for polish to dry, and press-on nails are perfect for achieving that swiftly.
image
Getting Started: What You'll Need
Don’t stress about fancy equipment. Most supplies for your DIY manicure, including convenient nail stands, can be found easily online, at local shops, or, if you’re lucky, lurking in your beauty drawer:
|
Supplies |
Description |
|
Full cover nail tips |
Short, medium, or long; various shapes (almond, square, oval, etc) |
|
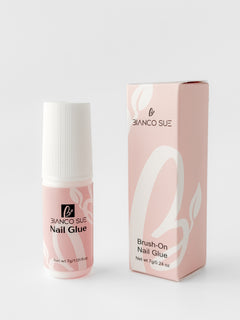
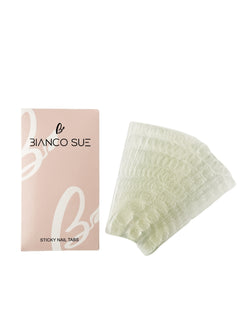
Nail glue or double-sided nail tabs |
For sticking press-ons in place |
|
Nail buffer/file |
Smooth the surface and shape your press-ons |
|
Rubbing alcohol or acetone |
Cleanses nails for better sticking power |
|
UV/LED lamp (optional) |
For curing gel polish or top coat |
|
Polish or gel polish |
Any colour you fancy |
|
Top coat |
Glossy, matte or sparkly for the finish |
|
Cuticle stick |
Pushes back cuticles for a neat fit |
|
Decorations (gems, stickers, magnetic polishes, etc) |
For the fun stuff! |
image
Step 1: Prepping Your Natural Nails
Prep is key, whether you’re aiming for a chic workday nude or going all out with gems and cat eyes.
1. Wash your hands with soap to remove natural oils.
2. Push back your cuticles gently using the stick. This helps your press-on nails fit snugly.
3. Buff the surface of each nail lightly — this removes shine and gives the glue or tabs something to grip onto for your press-on nails.
4. Shape your natural nails to match the press-ons. If your real nails peek out underneath, the fake ones won’t sit well.
5. Wipe nails with rubbing alcohol or acetone for a squeaky-clean base.
image
Step 2: Customising Your Press-On Nails
Here’s where things get fun. Customise your DIY press-ons before you put them on — it’s much easier to paint and decorate them off your hands.
Colour your way
● If you’re after a simple, solid finish (think classic nudes, bright reds or pastels), consider using press-on nails; just pop the nail tips onto nail stands or a stick (blu-tack on skewers does the trick) and paint away.
● Want to try the latest look? Cat-eye polishes react to magnets for a shimmering, multidimensional finish. Hold the magnet above the wet gel, and watch the magic.
● For a set with extra wow factor, gems and stickers can be gently pressed into wet gel or stuck down with a dab of glue before sealing with a glossy top coat.
Going Super Short?
Extra short press-on nails suit those always on the go (and the nail-biters among us). Simply file down your full cover tips before painting, or buy a short style to start with.
Pro Tip
A little planning goes a long way. To keep things even and avoid wonky gems or lopsided artwork, lay out your nails in a row in the sequence you’ll wear them. Work from your thumb across to your pinky. This not only helps with symmetry but also saves time once you start decorating. Planning ahead also means you can play with colour gradients, accent nails, or mix-and-match designs more easily. Take a moment to visualise the full set — you’ll thank yourself when the final look is perfectly cohesive and salon-level stunning. Don’t forget to snap a pic for inspo next time!
image
Step 3: Application — Getting That Salon-Perfect Fit
Taking your time here pays off, especially if you want your set to last.
1. Try each nail for size before applying glue. Ensure the sizing is correct for a snug fit. If a tip is slightly wide, file the sides a touch until it hugs your natural nail perfectly.
2. Dot glue or press a nail tab onto your real nail. Use enough to cover the nail, but not so much it oozes out the sides.
3. Press the tip on at the cuticle, angled slightly forward, and then gently rock it down. Hold for 20-30 seconds to get a solid hold, especially when using press-on nails.
If you’re using gel, you can flash-cure each nail for a few seconds under a UV lamp.
Repeat for each finger, and you’ll be admiring your fresh set in no time.
image
Troubleshooting: Keeping Your Nails On and Looking Fresh
Nobody wants a rogue nail falling off mid-meeting or while juggling a supermarket trolley. Here are a few ways to avoid drama:
● Too much glue? Less is often more, but make sure every bit of the nail is covered.
● Popped off already? Wait at least an hour before doing anything overly hands-on, especially with water.
● Nails not sticking? Double-check all oil and dust is removed from your real nail before applying.
● Edges lifting? Try a dab more glue under the edge and press again.
image
Styles to Try at Home
Now for a hit of inspiration. A few favourite styles are below — each one you can make at home with Bianco Sue tips, no pro experience needed.
1. Extra Short, Barely There
Perfect for busy hands. Choose the smallest nail tip size for your press-on nails, give them a gentle squoval shape, and finish with a sheer nude or pretty pale pink polish. These are nearly invisible and won’t get in the way of texting, typing or wrangling the kids.
2. Solid Colour Chic
These are the press-on nails for all seasons. Bright cherry reds, moody navy, creamy latte browns — the world is your oyster. Match to your outfit, or match your moods all week with quick swaps, since redoing your tips is a breeze.
3. Sparkle with Gems
Add a single statement sparkle to your ring finger, or go full bling on every nail with press-on nails. Gems come in all shapes and shades — stick to subtle rhinestones for some low-key shimmer, or create intricate patterns if you’re feeling crafty and love a DIY approach.
4. Magnetic Cat-Eye
A favourite for those who want nail art without needing a steady hand is using press-on nails. Cat-eye polishes (with magnetic pigments inside) create a swirling velvet finish, shifting colour with the light and direction of the magnet. You’ll need a special magnet (usually sold with the polish), but the hypnotic results are worth the tiny bit of extra effort.
image
How Press-On Nails Stack Up
Just for a quick comparison, let’s see how press-on nails compare to other at-home manicure options:
|
Feature |
Press-On Nails |
Traditional Polish |
Gel Polish at Home |
|
Application time |
10-20 min |
20-40 min |
30-60 min |
|
Lasts |
5-14 days |
3-7 days |
10-20 days |
|
Mess factor |
Low |
Moderate |
High |
|
Customisation |
High |
Medium |
High |
|
Skill needed |
Beginner friendly |
Moderate |
Moderate/High |
|
Removal |
Very easy |
Easy |
Requires soaking |
|
Nail damage risk |
Low* |
Low |
Medium/High |
*As long as you remove press-on nails with care and don’t rip them off!
image
Care, Storage, and Reuse
A good set of handmade press-on nails is a little investment, so it’s worth keeping them nice for another round.
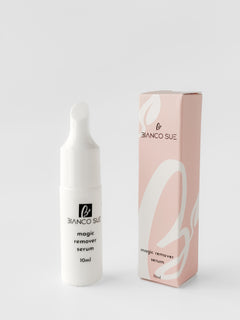
● To remove: Soak your nails in warm, soapy water for 10-15 minutes, then gently wiggle the tips off. If you’ve used tabs instead of glue, they’ll usually lift straight away with no fuss.
● To clean: Wipe both natural nails and tips with alcohol to remove any residue or glue lumps.
● Storage: Pop clean, dry nails in a small, labelled box or pill case — especially handy if you’ve gone through the effort to bedazzle a special set!
● To reuse: Give them a gentle buff, a new line of glue, and you’re sprung for your next special event.
image
Quick Fire Tips
● Always do a “dry run” to check the sizing and ensure each tip fits before gluing anything down.
● If you’re someone who works with your hands a lot, keep nails extra short for comfort.
● Experiment with nail stands to keep your setup organized and try a matte top coat for a completely different vibe.
● If you smudge or chip one, filing down the edge or adding a sticker can patch it up.
No matter your style, with just a handful of supplies, a spare half hour, and a little patience, a fresh set of perfectly tailored nails is right at your fingertips. Biancosue makes it easier than ever to create press-on nails at home, allowing for endless customisation with ease — offering salon-quality results at a fraction of the cost. Perfect for busy, style-conscious individuals seeking convenience and versatility.