
Press-on nails can look astonishingly real, yet the same set can also read as thick, raised, and a bit “stuck on” from across the room. If you have ever looked at your hands in daylight and thought the nail looks taller than it should, or the cuticle area seems to sit up instead of melting into your natural nail, you are seeing bulk.
The good news is that bulk is rarely a “you” problem. It is usually a mix of fit, prep, and a few small application habits. Once you know what creates that extra height, you can fix it quickly and get that clean, salon-like profile that makes press-ons so satisfying.
What “bulky” actually means (and why it happens)
Bulk is not only about thickness. It is the overall silhouette: how high the nail sits, how it transitions at the cuticle, and whether the sidewalls look smooth or stacked.
A press-on can be made from quality material and still look bulky if it is the wrong curvature for your nail bed, or if adhesive creates a mound. Think of it like tailoring. Even great fabric looks off when the cut is wrong.
There is also a visual trick at play. A press-on that is slightly too wide, or not seated fully into the cuticle line, casts tiny shadows along the edges. Those shadows are what make a set look “clunky” in photos.
The most common reasons press-ons look thick
Most bulk comes from a small number of causes. If you can identify which one is happening on your hands, the fix is usually simple.
Here are the usual culprits:
● Wrong size (too wide or too large)
● Too much adhesive
● Natural nails not prepped properly
● Cuticle area not blended
● Strong mismatch in nail curvature
● Press-on placed too high from the cuticle line
● Air pockets from uneven pressure
Fit first: choosing a nail that sits flatter
If a nail does not match your nail bed’s curve, it will either pinch at the sides or hover in the centre. Hovering creates height, and height reads as bulk.
Start by sizing so the press-on covers the nail from sidewall to sidewall without bending your natural nail. If you are between sizes, choosing the slightly larger size and filing down the sides usually looks cleaner than forcing a smaller nail to stretch.
When you are test-fitting, look at the nail from the side. A good match will sit low and stable before any glue goes on. If it rocks, it will almost always look thicker after application.
A quick way to assess curvature is to place the press-on on your natural nail without adhesive and press gently at the centre. If the edges lift, the press-on is flatter than your nail bed. If the centre lifts, the press-on is more curved than your nail bed. Either mismatch can be managed, yet you may need different adhesive choices and a little shaping.

Prep that makes press-ons look “built in”
Prep is where most of the bulk gets prevented. Adhesive sticks best to a clean, slightly textured surface, which also helps the press-on seat closer to the nail plate.
Aim for a routine that is quick and repeatable:
● Wash and dry hands well, then avoid hand cream right before application.
● Push back cuticles gently so the press-on has room to sit close to the cuticle line.
● Lightly buff shine off the nail plate (you want a soft matte finish, not a thinned nail).
● Remove dust, then cleanse nails with alcohol or a nail dehydrator.
If your hands run oily or you live in a humid part of Australia, spend an extra ten seconds on cleansing. A tiny amount of surface oil can create micro-lifting that looks like thickness at the edges.
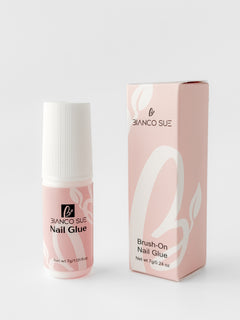
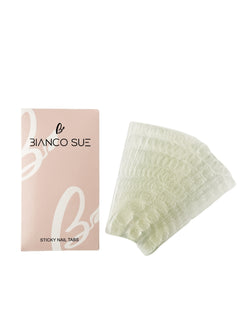
Adhesive choices: tabs vs glue (and why bulk changes)
Adhesive is the most direct contributor to bulk because it physically adds height. Nail glue can be very low-profile when used correctly, while adhesive tabs can be slightly thicker yet beautifully even. “Even” can still look natural if the nail sits flush at the cuticle and the sidewalls.
Choose based on your priorities:
|
Your goal |
Best option |
Why it helps with bulk |
Watch-outs |
|
Lowest profile, most natural cuticle blend |
Nail glue |
Can be spread thin and pressed flat |
Too much glue creates a mound |
|
Fast application and easy removal |
Adhesive tabs |
Even layer prevents random high spots |
Tabs can show thickness if the nail fit is off |
|
Stronger hold for active days |
Glue with careful pressure |
Can fill tiny ridges without extra height |
Overfilling causes lift and shine-through |
|
Re-wear sets often |
Tabs (or minimal glue) |
Less mess, less build-up on the press-on |
Tabs need precise sizing to avoid edges peeking |
A practical rule: if your set looks bulky at the cuticle, you likely used too much adhesive or the press-on is not seated into the cuticle curve. If it looks bulky through the whole nail, curvature or sizing is usually the issue.
Application technique: where most people accidentally add height
Press-ons look their sleekest when they are applied with controlled placement and firm, even pressure. Rushing is what creates air pockets, and air pockets force you to press harder later, which often shifts the nail and leaves a thicker edge.
Start by placing the press-on at a slight angle, aiming the base of the nail into the cuticle area first, then gently rolling it down toward the free edge. This reduces trapped air and helps the cuticle line sit tight.
Use less adhesive than you think you need. With glue, a small bead spread thinly is usually enough. With tabs, choose a tab that covers most of your nail plate without wrapping onto skin, then press firmly from the centre outward.
After the nail is down, hold it in place with consistent pressure. Thirty seconds of proper pressure beats two minutes of fidgeting and re-pressing, which can shift the nail and create a thicker-looking ridge.
A few habits that keep the profile slim:
● Angle first, then roll down: reduces air pockets that make the nail sit high.
● Centre pressure, then sidewalls: seats the edges so they do not cast shadows.
● Clean cuticle line immediately: wipe stray glue before it sets into a ridge.
● Hands flat while setting: keeps nails from sliding forward and lifting at the base.
The cuticle blend: the difference between “press-on” and “manicure”
Many press-ons look bulky because the cuticle edge is visibly thick. This is where a small amount of finishing work pays off.
Once the nails are secure, check the cuticle line in strong light. If you can see a step, you can usually soften it by carefully filing the surface near the base with a fine file or buffer. The goal is to taper the press-on slightly so it visually disappears into the natural nail line.
Keep the file nearly parallel to the nail surface and use light strokes. Heavy pressure can scuff polish or create flat spots. If your set is already painted or glossy, a gentle buff at the base followed by a thin layer of top coat can restore shine while keeping the profile refined.
Also check the sidewalls. If the nail is even slightly too wide, it will lift from the sides and look thicker. A small amount of side filing, done before application, can transform the final look.
When the press-on itself is thick: shaping without weakening
Some designs are intentionally more structured, which can read as bulk if the shape is not balanced with your finger length and nail bed size. A shorter nail with a very high apex can look “helmet-like,” while the same thickness in a longer almond may look elegant.
If you suspect the nail is simply too thick for your taste, focus your adjustments on the edges, not the centre. Thinning the free edge and softening the cuticle edge creates the illusion of a slimmer nail without compromising strength where you need it.
If the nail is a touch long, shortening it can also reduce bulk instantly. Length amplifies thickness visually. A shorter, well-shaped nail often looks more expensive than a longer nail that feels heavy.
A quick troubleshooting guide (bulk, mapped to fixes)
If you want a fast diagnosis, match what you see to what you do next.
|
What you see |
Likely cause |
What to do next time |
What you can do now |
|
Thick ridge at cuticle |
Too much glue or poor seating |
Use a smaller glue amount, angle-roll placement |
Lightly buff ridge, apply top coat |
|
Nail looks “floating” in the middle |
Curvature mismatch |
Try a different shape/brand, consider glue over tabs |
Reapply with glue spread thinly in centre |
|
Side shadows and lifting |
Nail too wide or tab too large |
Size down then file, or choose smaller tab |
Carefully file sidewalls if secure |
|
Overall tall profile |
Tab thickness plus imperfect fit |
Prefer glue for lowest profile |
Refit sizes, reapply with thinner adhesive |
|
Uneven height across nails |
Inconsistent pressure and timing |
Press each nail for same duration |
Repress immediately if glue is still workable |
Where Bianco Sue’s origin story fits into all this
Press-ons are loved for their convenience because they deliver a polished look without taking hours out of your schedule. At Bianco Sue, the focus is on effortless, adaptable beauty — nails that look refined but still work with real life.
That same mindset applies to avoiding bulk. When press-ons are treated as a flexible system rather than a one-time application, the results improve quickly. Test fit, refine your prep, adjust sizing, and re-wear sets with better technique each time. Small upgrades make a visible difference.
A press-on set does not need to be permanent to look polished. It simply needs to fit well, sit flush, and complement the hands wearing it.
 The polished look is mostly small decisions
A slim, natural press-on finish is rarely about one magic product. It comes from a few calm, repeatable choices: better sizing, cleaner prep, thinner adhesive, controlled pressure, and a gentle blend at the cuticle.
Once those pieces are in place, press-ons stop looking like an add-on and start looking like your nails, only sharper, cleaner, and ready when you are.